|
IOLMaster — Patient Manager.
Manage Existing Patients
The IOLMaster keeps an internal patient file. All data is stored here and
can be retrieved (view, post-treatment, printing).
 |
NOTE: The file is not designed for archiving patient and measurement
data. |
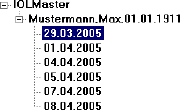
The database field is structured similar to Windows Explorer (see Fig.
25, left side). A + sign at the branch indicates that the database already
contains measurement results for this patient.
- Click on the + to display the treatment data for the last
measurement(s). To close, click on the - sign.
|
|
 |
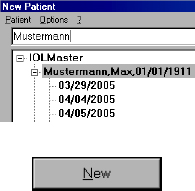
The data records are sorted alphabetically by last name.
Use the Search textbox to quickly access a data record. Place the cursor
in this box and type in the desired last name to list all relevant data
records. The following letters of the name can also be entered; this
ensures fast access to the desired data record.
On repeat visits, data can be instantly transferred to the input area by
clicking on the patient's name.
To take a new measurement, click the NEW button or use the keyboard
shortcut ALT + N. |
|
 |
Retrieve Previous Measurements
The system permits the review of data records of previous sessions.
 |
- Click on the + sign in front of the patient's name.
- Use the cursor to mark the examination date being sought.
- To view the measured data, press the OPEN icon, use the keyboard
shortcut
<ALT> + <F> or double-click on it. The data record is now
ready for further editing. However, no new measurements can be
taken.
- Automatic right/left detection is deactivated. To select a side, click
the cursor on the appropriate display or press the <R> or <L> key.
|
Delete Patient or Measurements
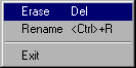 |
- To delete a patient from the patient list, highlight the name and
press <del> or select Delete from the Patient menu.
- Confirm the delete action with YES. Personal data and individual
measurements for this patient will be irrevocably deleted in the
Patient Manager. The numerical measurement data will still be
available in the database for optimization of lens constants.
|
|
NOTE:
If you are working with the option User login with password,
you may only delete patient data if you have the appropriate
rights (see User Database). |
| |
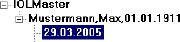 |
If an examination date is highlighted, only the data for this examination
date will be deleted. The patient name and other measurement data will
be retained.
|
NOTE: In Options - Setup - Program Settings you can set the number
of days after which a data record is automatically deleted (5 to
365 days). |
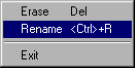
Rename Patient
To edit the last name, first name, date of birth or ID No. of a patient,
follow this procedure:
- Highlight the patient's name and press
<CTR> + <u> or select
Rename in the Patient menu.
|
|
 |
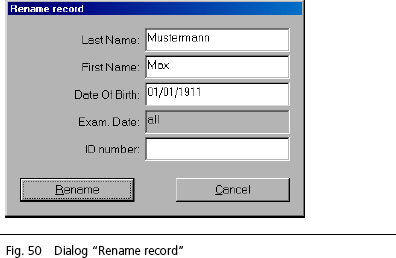
The patient data can be edited in the dialog box which now appears.
Once the renaming has been confirmed, patient data for all
measurements will be changed. If personal data is to be changed for
only one examination date, the examination date must be highlighted
before the <CTR> + <U> keys are pressed. Measurement
results cannot be renamed! |
|
 |
- Confirm the changes with RENAME.
Transmit/Export Data (optional)
Patient data can be exported to
- connected office administration systems or personal computers
- a USB storage medium or a CD-RW.
The data is then available for further processing.
|
NOTE: Transmitting/exporting does not work in the Patient Manager,
only in measurement modes! |
Export Data to Another System
- Data can only be exported to office management systems by the
supplier of such systems. Please contact the respective supplier.
- The appropriate accessories are required for exporting to a
connected Windows-based personal computer. These can be
obtained from Carl Zeiss Meditec. They include a serial cable (null
modem, female/female connector) and software (on CD ROM) to be
installed on the PC. Data is imported to a database on the PC. From
there, data can be exported to other file formats. The graphs of axial
length measurements are made available in JPEG format.
 |
- To export data press the <S> key (not in Patient Manager!) or the
SEND button.
The data will be exported.
|
|
NOTE: The PC must have been switched on and the software for data
receipt started. A progress bar will be visible on the screen of the
IOLMaster. Data can be archived on the PC or processed in the
appropriate form. |
|
NOTE: The PC must have been switched on and the software for data
receipt started. A progress bar will be visible on the screen of the
IOLMaster. Data can be archived on the PC or processed in the
appropriate form. |
The export of measured values depends on whether the additional
software Option A plus is installed:
- Without Option A plus: only the measured values and the marked
IOL will be exported.
- With Option A plus the measured values and all calculated lenses
will be exported (see Setup),
depending on the setting in
Program Settings/Export.
Export Data to a Storage Medium
- Select the desired storage medium in the menu Options - Setup -
Program settings/Export (see Setup).
|
NOTE: If you wish to export to a CD-RW, you must insert a formatted
CD-RW into the drive. The CD-RW must be formatted elsewhere
(e.g. office PC) in UDF format. Alternatively, use one of the
formatted CD-RWs as supplied. For exporting to an USB flash
drive the latter should enable at least a transfer rate to USB-1.1. |
 |
|
- To export data to a USB storage medium or a CD-RW press the <X>
key or the EXPORT icon.
|
Data will be available in a text file conforming to the export settings (see
Setup) for archiving and data analysis.
|